Thursday, 28 April 2011

Light painting

painting with lightPainting with light is a fun technique that gives great results. It is called painting with light because this is what you are actually doing while taking the shot - painting with light.
You don't need much to experiment with this kind of shot, just make sure you have the following items:
1. A camera capable of long exposures - film cameras will work OK, but if you really want to get the most out of the shooting session, use a digital camera. You will be able to see the results in "real time" and make corrections as you go.
2. A nice tripod. Since you will be doing some long exposures you want to make sure your camera sits still. If you don't have a tripod you can make one in a few minutes (see this article or this one).
3. A flash light - and by flash light I do not mean flash as in a speedlight, but the flash light or what our British will call a torch.
4. A dark location. This one is tricky. If you are going to shot at home - a dark room will be OK. If you are going to shoot outside - make sure that you are not doing this under a street light, or where a car can come by and "paint its headlight" all over your shot.
Here is how it's done:
Set your camera on the tripod and take a sample shot with flash / lights on. This will help you verify that your composition is OK.
Set the exposure to a relatively long value. Stop down the aperture as much as you need. If you are outside do nothing. If you are inside - this is the time to turn off the lights.
Make the click. Once the shutter is open use your flashlight to light the stuff that you want to "paint". You can use the flashlight as a brash, and "smear" the light, just like you would have done with brush and paper. Or, you can use the light as a pen, and do precise work. Areas where you go slowly will be more lit then others. Be careful not to linger to much over the same stop - you will burn it. (The machos amongst you will correctly identify this as the "I forgot the iron on the shirt" phenomena).
Once the shutter closes, you are a free person again. Inspect your image and make corrections.
Here are some great ideas to use this technique with:
Product like shot - In a closed (dark) room place your product on a table and paint it's contour. You can use several colors to make a strong effect or to draw different (even imaginary) parts of your object.
painting_with_light_glass

Image by Rodrigo da Cunha
Location shot - find a location with some ambient light. Find an object that is less "hit" by that light. now you can use the ambient light to capture the background, while painting the object with light. You will get a nice effect - with some surreal foreground and a "normal" background. Also the white balance will be different on ambient and painted - another cool side affect.
painting with light car

Image by hyper7pro
Environmental Graffiti - If you are shooting a wall (or even on thin air...), you can scribe on the wall. Make funny graffiti; Write huge love notes; Make a political statement - there will be no trace left other then the one on your memory card.

Tuesday, 5 April 2011


Hasselblad Launches World's First 48mm

Full-Frame DSLR Camera System

With a new, fully digital strategy, Hasselblad sets new benchmark in high-end DSLR camera systems for professional photographers.
Hasselblad is today firmly positioning itself as the pre-eminent provider of high-end digital cameras with the launch of the Hasselblad H3D, the world’s first 48mm full-frame DSLR camera system.  The H3D is the result of Hasselblad’s strategy of taking photographic flexibility and image quality to new levels, as yet unseen in any competing product.  When compared with high-end 35mm DSLRs, the H3D delivers unmatched pixel resolution, better colors and detail rendering and a new choice of viewfinders for creative image composition.  In comparison with digital backs, the H3D delivers image quality with a higher level of detail and true sharpness thanks to Hasselblad’s Digital APO Correction (DAC) and the advances of its new Ultra-Focus functionality.  The H3D’s full-frame concept offers unique control of image composition and with its new 28mm lens, the H3D allows photographers for the first time ever to take wide angle shots on a 36 x 48mm sensor.
Christian Poulsen, CEO of Hasselblad comments: “The digital revolution prompted many professional photographers to adopt high-end 35mm DSLRs as their back-up or even their main camera.  But as the most demanding photographers have become acquainted with the technology, the feedback we’ve had indicates that high-end 35mm often doesn’t offer the required image quality.  Many photographers also miss the high-end camera system’s additional photographic flexibility that is beyond the physical parameters of the high-end 35mm DSLR, which was originally designed for ultra-fast shooting environments.  Hasselblad has been deluged by requests from traditional camera back buyers for true wide angle photography and extended image quality.  We’re confident that in the H3D, a logical evolution of the H1D and H2D, professional photographers will find the complete photographic solution for these needs.  What Victor Hasselblad managed to develop with the classic V camera system, the H3D now extends into the digital age.”

Size matters

The H3D is currently available in two models, the Hasselblad H3D-22 and the Hasselblad H3D-39, offering image capture with a resolution of either 22 or an unsurpassed 39 megapixels on the largest image sensor currently available in digital photography – more than twice the size of a high-end 35mm camera sensor.  The system’s viewfinders and extra large and bright lenses enable extremely precise compositions and easy operation in dim lighting.

Ultra-Focus and Digital APO Correction boost lens performance

The H3D is built around a brand new digital camera engine, providing a new standard of image sharpness, ‘Ultra-Focus’.  In the H3D camera, information about lens and exact capture conditions are fed into the digital camera engine for ultra-fine-tuning of the auto-focus mechanism, taking into account the design of the lens and the optical specification of the sensor.  By then adding Digital APO Correction (DAC) – digital, APO-chromatic correction of the color aberration and distortion in the images - Hasselblad raises the performance of the full HC lens range to a new level of sharpness and resolution and, with perfect pixel definition, optimizes the basis for image rendering.

World’s first 28mm wide angle lens for 48mm DSLR camera systems

Hasselblad has designed a new 28mm wide angle lens especially for the H3D.  To achieve the necessary optical performance, the Hasselblad lens designers have taken full advantage of the Ultra-Focus and DAC functionality to ensure that outstanding images are produced by this extraordinary lens.  Photographers who work with the H3D and the HCD 28mm lens will be amazed by the full-frame composition and unmatched wide angle image quality.

New waist-level viewfinder

Taking the V System’s lead, Hasselblad is launching an interchangeable, waist-level viewfinder for the H system cameras.  The new waist-level viewfinder is a superb composition tool that allows the photographer to maintain direct eye contact with the model throughout the shoot, particularly important for fashion and people shoots.  The H3D thus offers a choice of viewfinders – eye- or waist-level – an important flexibility for the professional photographer.
Hasselblad Star Quality
To define the core parameters of optimal image quality, Hasselblad is introducing its Hasselblad Star Quality standard. Traditionally, resolution or the number of pixels on the sensor has been perceived as the most important quality factor in digital photography, but in fact other parameters have similar or even greater impact – sharpness, the definition of small details, color and low noise.  Hasselblad has spent the last two years developing the underlying technology to optimize these parameters:
Resolution:    – State of the art 39 megapixels
Sharpness:    – Ultra-Focus and DAC
Small details: – Single shot interpolation
Color:           – Hasselblad Natural Color Solution
Low noise:     – Digital noise reduction
With the introduction of the H3D, Hasselblad has produced a camera system that can deliver the highest image quality to date.

Photographic Flexibility
To allow the photographer to shoot the most creative and best composed images, the H3D has also been developed for maximum flexibility:
Viewfinder flexibility:          - The system offers a choice of viewfinders for image composition and is compatible with Hasselblad’s standard H System lenses and the new 28mm digital HCD lens.
Tilt and Shift flexibility:       - The digital capture unit can be used on a view camera with tilt and shift functionality.
Storage flexibility:             - The H3D also gives the professional photographer three options for image storage: on a CF card, to a Hasselblad Image Bank (a 100GB drive with a write speed of up to 60MB/sec) via FireWire, or the tethered operation with extended, special capture controls.
Film flexibility:                  - In exceptional circumstances, such as extreme heat or cold or extremely long or short exposure times, it is also possible to switch to film.

With these operating and storage options, the photographer is able to select a mode to suit their work, whatever the nature and whether in the studio or on location. 
Christian Poulsen concludes: “It has been a major achievement for Hasselblad to have implemented its new, fully digital strategy.  We are confident that the H3D, the first product resulting from the new strategy, will set new standards for digital photography, even when compared with the best 35mm DSLR cameras and digital backs.  In pursuance of our objectives, we will continue to focus on bringing to market digital products that offer flexibility and the best possible image quality, and on working with existing and new Hasselblad users to help them take full advantage of the potential that digital technology holds for them, both creatively and commercially.”
The new H3D is available immediately worldwide through Hasselblad’s national subsidiaries and channel partners at retail prices to be announced at Photokina.
An H3D upgrade program is available for current H1D and H2D users.

Tuesday, 29 March 2011

What the hell....

Canon EF 1200mm f/5.6 L USM
Kalau ke KLCC sekarang mesti anda boleh lihat kelibat manusia-manusia berkamera DSLR. DSLR sudah menjadi hobo kegemaran dikalangan remaja dan young adult dari kelas pertengahan di Malaysia. Semua nak tunjuk skill dan gear yang mahal macam sial. Well kalau anda seorang DSLRfag, ini ialah lensa tahap dewa yang boleh membuatkan anda menjadi raja DSLR Malaysia.


Canon EF 1200 f/5.6 L USM ialah lensa terpanjang yang pernah dibuat oleh Canon. Ia mula dibuat pada tahun 1984 khas untuk sukan Olimpik di Los Angeles. Sejak itu sebanyak 20 lensa besar gedabak ini wujud didunia. That means you are more likely to find a Bugatti Veyron than this uber lens.


How uber? Jika anda menempah lensa ini, anda perlu menanti selama 18 bulan sebelum ianya sampai ke tangan anda. Sebabnya ialah kanta kristal fluorite yang digunakan memerlukan masa setahun untuk membesar ke saiz yang sesuai (kanta fluorite dibuat secara artificial didalam makmal - macam mutiara) . Anda juga perlu membayar USD 120 000 untuk memiliki lensa ini! Shit. Tak cukup dengan harga yang mahal beratnya juga boleh tahan. Setiap unit lensa ini beratnya ialah 16.5 kilogram!


Wednesday, 23 March 2011

Henri Cartier Bresson


Henri Cartier-Bresson

French, b. 1908, d. 2004
Born in Chanteloup, Seine-et-Marne, Henri Cartier-Bresson developed a strong fascination with painting early on, and particularly with Surrealism. In 1932, after spending a year in the Ivory Coast, he discovered the Leica - his camera of choice thereafter - and began a life-long passion for photography. In 1933 he had his first exhibition at the Julien Levy Gallery in New York. He later made films with Jean Renoir.
Taken prisoner of war in 1940, he escaped on his third attempt in 1943 and subsequently joined an underground organization to assist prisoners and escapees. In 1945 he photographed the liberation of Paris with a group of professional journalists and then filmed the documentary Le Retour (The Return).
In 1947, with Robert Capa, George Rodger, David 'Chim' Seymour and William Vandivert, he founded Magnum Photos. After three years spent travelling in the East, in 1952 he returned to Europe, where he published his first book, Images à la Sauvette (published in English as The Decisive Moment).
He explained his approach to photography in these terms, '"For me the camera is a sketch book, an instrument of intuition and spontaneity, the master of the instant which, in visual terms, questions and decides simultaneously. It is by economy of means that one arrives at simplicity of expression."
From 1968 he began to curtail his photographic activities, preferring to concentrate on drawing and painting. In 2003, with his wife and daughter, he created the Fondation Henri Cartier-Bresson in Paris for the preservation of his work. Cartier-Bresson received an extraordinary number of prizes, awards and honorary doctorates. He died at his home in Provence on 3 August 2004, a few weeks short of his 96th birthday.

Awards
1986          Novecento Premio
1981          Grand Prix National de la Photographie
1975          Deutsche Gesellschaft für Photographie
1975          Culture Prize
1964          Overseas Press Club of America Award
1960          Overseas Press Club of America Award
1959          Prix de la Société Française de Photographie
1954          Overseas Press Club of America Award
1953          A.S.M.P. Award
1948          Overseas Press Club of America Award
Exhibitions
2006          Scrapbook - Fondation Henri Cartier-Bresson, Paris, France
2003/05     De qui s’agit-il ? - Bibliothèque Nationale de France, Paris, France;
                 Fundacion Caixa, Barcelona, Spain; Martin Gropius-Bau, Berlin, Germany;
                 Scottish National Gallery Edinburgh, UK
1998/00     Henri Cartier-Bresson Portraits: Tête à Tête - National Portrait Gallery, London,
                 UK; Scottish National Gallery, Edinburgh, UK;
                 National Portrait Gallery, Washington D.C., USA
1997/99     Des Européens - Maison européenne de la Photographie, Paris, France;
                 Hayward Gallery, London, UK; Le Botanique, Bruxelles, Belgium;
                 Museo della Fotografia Storica; Torino, Italy; Kunsthalle, Düsseldorf, Germany;
                 Louisiana Museum, Copenhagen, Danmark, Art Museum Helsinki City, Helsinki,
                 Finland
1996          Carnets mexicains de Henri Cartier-Bresson - Centre National de la Photographie,
                 Paris, France 
1994          Hommage to Henri Cartier-Bresson - ICP, New York, USA 
1991          Henri Cartier-Bresson - Osaka University of Arts, Osaka, Japan
1987          Henri Cartier-Bresson: The Early Work - The Museum of Modern Art, New York,
                 USA
1985/88     Henri Cartier-Bresson en Inde - CNP, Palais de Tokyo, Paris, France;
                 Musée de l'Elysée, Lausanne, Switzerland; ICP, New York, USA;
                 National Gallery of Modern Art, New Delhi, India
1984/85     Photographs by Henri Cartier-Bresson from Mexico, 1934 and 1963 -                  Art Museum of South Texas, Corpus Christi, USA;
                 Center for Creative Photography, Tucson, USA
1984          Paris à vue d'oeil - Musée Carnavalet, Paris, France
1980          Henri Cartier-Bresson : 300 photographies de 1927 à 1980 -
                 Musée d'Art moderne de la Ville de Paris, Paris, France
1979/80     Henri Cartier-Bresson Photographer, ICP, New York, USA; The Art Institute,
                 Chicago, USA; Carnegie Institute, Pittsburgh, USA; Virginia Museum of Fine Arts,
                 Richmond, USA, Palacio de Bellas Artes, Mexico City, Mexico;
                 Seattle Art Museum, Seattle, USA
1978          Cartier-Bresson : Archival Collection - Osaka University of Arts, Osaka
1976          Selected Photographs by Henri Cartier-Bresson - The National Gallery
                 of Modern Art, New Delhi, India
1974          A propos de l'URSS 1953-1974 - ICP, New York, USA
1970          Henri Cartier-Bresson : En France - Galeries nationales du Grand Palais, Paris
1969          Photographs by Henri Cartier-Bresson - Victoria & Albert Museum, London, UK;
                 Graves Art Gallery, Sheffield, UK; City Art Gallery, York, UK;
                 City Art Gallery, Leeds, UK; Museum of Modern Art, Oxford, UK
1968          Cartier-Bresson : recent photographs - The Museum of Modern Art,
                 New York, USA
1966          Photographies d'Henri Cartier-Bresson - Musée des Arts Décoratifs,
                 Paris, France; Villa Comunale, Milano, Italy; Kunsthalle Köln, Germany
1966          After The Decisive Moment 1966-1967 - Asahi Shimbun, Tokyo, Japan
1964          Photographs by Cartier-Bresson  - The Phillips Collection, Washington D.C., USA
1957/60     Henri Cartier-Bresson : The Decisive Moment (same exhibition than in 1955/56) -
                 R.B.A Gallery, London, UK; Nihombashi Takashimaya, Tokyo, Japan;
                 M.H. de Young Memorial Museum, San Francisco, USA, IBM Gallery,
                 New York, USA,
1955/56     Henri Cartier-Bresson : Photographies 1930-1955 - Musée des Arts Décoratifs,
                 Pavillon de Marsan, Paris, France; Kunstgewerbemuseum, Zürich, Switzerland;
                 Stadtisches Museum, Leverkusen, Germany; Kunstverein München, Munich,
                 Germany; Bremer Kunsthalle, Bremen, Germany; Staatliche Landesbildstelle
                 Museum, Hamburg, Germany; Palazzo della Societa per le belli Arti, Milano,
                 Italy; Circolo della Provincia, Bologna, Italy
1953          Great Documentary Photographer : Henri Cartier-Bresson - The Art Institute
                 of Chicago, Chicago, USA
1952          215 fotografie de Henri Cartier-Bresson - Strozzina di Firenze, Firenze, Italy
1952          Photographs by Henri Cartier-Bresson - Institute of Contemporary Arts, London,
                 UK
1947          The Photographs of Henri Cartier-Bresson - The Museum of Modern Art, New York,
                 USA
1935          Fotografias : Cartier-Bresson, Alvarez Bravo - Palacio de Bellas Artes de Mexico,
                 Mexico City, Mexico
1935          Documentary & Anti-Graphic Photography - Photographs by Cartier-Bresson
                 Walker Evans & Manuel Alvarez Bravo
- Julien Levy Gallery, New York, USA;
1933          Photographs by Henri Cartier-Bresson and an exhibition of
                 Anti-Graphic Photography 
- Julien Levy Gallery, New York, USA;
                
Ateneo Club, Madrid, Spain
Collections
Bibliothèque Nationale de France, Paris, France
De Menil Collection, Houston, USA
University of Fine Arts, Osaka, Japan
Victoria & Albert Museum, London, UK
Maison Européenne de la Photographie, Paris, France
Musée Carnavalet, Paris, France
The Museum of Modern Art, New York, USA
The Art Institute of Chicago, USA
The Getty Museum, Los Angeles, USA
International Center of Photography, New York, USA
The Philadelphia Art Institute, Philadelphia, USA
The Museum of Fine Arts, Houston, USA
Kahitsukan Kyoto Museum of Contemporary Art, Kyoto, Japan
Museum of Modern Art, Tel Aviv, Israel
Stockholm Modern Museum, Stockholm, Sweden
Books
2006         Scrapbook, Steidl, Germany
2006         Portraits par Henri Cartier-Bresson, Thames & Hudson, France;
                (The portraits of Henri Cartier-Bresson) Thames & Hudson, UK
2003         De qui s'agit-il ?, Gallimard/Bibliothèque Nationale de France;
                (The Man, the Image and the World) Thames & Hudson, UK;
                (Di chi si tratta ?) Contrasto, Italy
2001         Paysages, Delpire éditeur; (Landscape Townscape) Thames & Hudson, UK;
                (City and Landscapes) Bulfinch, USA; (Paesaggi) Contrasto, Italy;
                (Landschaften und Städte) Schirmer & Mosel, Germany
1998         Tête à Tête, Gallimard, France; Thames & Hudson, UK;
                Bulfinch, USA; Schirmer & Mosel, Germany;
                Leonardo Arte, Italy
1997/98    Des Européens, Le Seuil, France; (Europeans) Thames & Hudson, UK;
                Bulfinch, USA; (Europaër) Schirmer & Mosel, Germany;
                (Gli Europei) Peliti Associati, Italy
1996/99    L'Imaginaire d'Après Nature, Fata Morgana, France; (The Mind's eye)
                Aperture, USA
1995         Carnets mexicains 1934-1964, Hazan, France;
                (Mexican Notebooks 1934-1964)
Thames & Hudson, UK;
                (Henri Cartier-Bresson Messico 1934-1964) Federico Motta Editore, Italy
1995         L'Art Sans Art, Flammarion, France; (Henri Cartier-Bresson and the Artless Art)
                Thames & Hudson, UK;
                Bulfinch, USA; (Henri Cartier-Bresson Seine Kunst Sein Leben)
                
Schirmer & Mosel, Germany
1994         Double Regard. Drawings and Photographs, Le Nyctalope, France
1994         Paris à vue d'oeil, Le Seuil, France; (A Propos de Paris) Thames & Hudson,
                UK; Bulfinch, USA; Schirmer & Mosel, Germany
1991         Alberto Giacometti photographié par Henri Cartier-Bresson, Franco Sciardelli,
                Italy
1991         L'Amérique Furtivement, Le Seuil, France; (America in Passing) Bulfinch, USA;
                Thames & Hudson, UK, Schirmer & Mosel, Germany;
                Federico Motta Editore, Italy
1991         Henri Cartier-Bresson - Premières photos : de l'objectif hasardeux au hasard
                objectif,
Arthaud, France
1989         L'Autre Chine, Centre National de la Photographie, France
1989         Trait pour trait, Arthaud, France; (Line by Line: Henri Cartier-Bresson’s Drawings)
                Thames & Hudson, UK, Schirmer & Mosel, Germany
1987         Henri Cartier-Bresson in India, Thames & Hudson, UK, USA
1987         Henri Cartier-Bresson - The Early Work, The Museum of Modern Art, New York, USA
1985         Photoportraits, Gallimard, France; Thames & Hudson, UK, USA;
                Schirmer & Mosel, Germany
1985         Henri Cartier-Bresson en Inde, Centre National de la Photographie, France
1983         Henri Cartier-Bresson: Ritratti 1928-1982 (Collection "I Grandi Fotografi"),
                Gruppo Editoriale Fabbri, Italy
1982         Photo Poche, Centre National de la Photographie, France
1979         Henri Cartier-Bresson: Photographe, Delpire éditeur, France;
                (Henri Cartier-Bresson: Photographer) Bulfinch, USA ;
                Thames & Hudson, UK;
                Pacific Press Service, Japan
1973         A propos de l'URSS, éditions du Chêne, France; (About Russia)
                Thames & Hudson, UK; Viking Press, USA
1972         The Face of Asia, John Weatherhill, USA & Japan; Orientations Ltd.,
                Hong Kong;  (Visage d'Asie) éditions du Chêne, France
1970         Vive la France, Robert Laffont, France; (Cartier-Bresson's France)
                Thames & Hudson, UK; Viking Press, USA
1969         L'homme et la machine, commissioned by IBM, éditions du Chêne, France;
                (Man and Machine) Viking Press, USA;  Thames & Hudson, UK
1969         Les Français, éditions Rencontre, Switzerland
1968         Flagrants délits - Photographies de Henri Cartier-Bresson, Delpire éditeur,
                France; (The World of Henri Cartier-Bresson) Viking Press, USA
1963         China as photographed by Henri Cartier-Bresson , Bantam Books, USA
1963         Photographies de Henri Cartier-Bresson, Delpire éditeur, France;
                (Photographs by Henri Cartier-Bresson) Grossman Publishers, USA;
                Jonathan Cape, GB; Asahi Shimbun, Japan
1958         Henri Cartier-Bresson: Fotografie, Statni Nakladatelstvi
                Krasné,Czechoslovakia        
1955         Les Européens, Verve, France; (The Europeans) Simon & Schuster, USA         
1955         Moscou vu par Henri Cartier-Bresson, Delpire Editeur, France; (People of Moscow)
                Thames & Hudson, UK; Simon & Schuster, USA
1954/56    D'une Chine à l'autre, Delpire éditeur, France; (China in Transition)
               
 Thames & Hudson, UK; (From One China to Another) Universe, USA
1954         Les Danses à Bali, Delpire éditeur, France
1952         Images à la Sauvette, Verve, France; (The Decisive Moment) Simon & Schuster,
                USA
1947         The Photographs of Henri Cartier-Bresson, The Museum of  Modern Art, USA
Films
1969/70     Impressions of California, 23', color
1969/70     Southern Exposures, 22', color
1944/45     Le Retour (The Return), 32', b&w
1939          La Règle du Jeu (The Rules of the Game), assistant to Jean Renoir
1938          L’Espagne vivra,  43', b&w
1937          Victoire de la Vie (with Herbert Kline), 49', b&w
1936          Une Partie de Campagne, second Assistant to Jean Renoir

Black and White Photography

- Karl Heiner
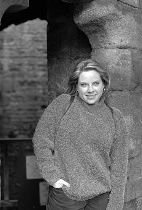
Black and White Portrait of Denise in England Since the first film was shot and developed, black and white has been a favorite choice among master photographers around the globe. Why is it that this medium is preferred by so many fine artists and masters of the trade?
  • It's classic and elegant, even romantic and special.
  • When learning photography, the simplicity of black and white helps you focus on the important stuff.
  • You can often turn a drab color shot into an amazing black and white.
  • If you do your own darkroom work - traditional or digital - it opens up a world of magic and fun.
For more Thoughts and Tips on Taking Black and White Pictures, read on ...


It's Classic and RomanticWhen people look at a black and white photograph, they often remark how "classic" and "elegant" it looks. For example, it remains to this day a popular choice for weddings. Headshots of CEOs and company presidents - destined for some annual report or other investor brochure - are also often shot in black and white.
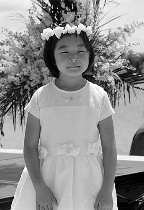
Flower Girl: Portrait in Black and WhiteBlack and white prints have a refined quality about them. The simplicity and uncluttered look give the subject a polished, high-class feel. Without the distractions of color, the picture begs each viewer to recognize the individuality and uniqueness of the subject.
Another reason why brides often ask for black and white is that it most clearly expresses the romantic. They know that there is something special about it. It has style. The most famous romantic images - Eisenstaedt's sailor kissing a nurse; Doisneau's couple kissing near a French hotel; Erwitt's lovers kissing in a rear-view mirror in California - have been bestsellers for years because they define the romantic.
Learning Graphic Concepts: Tips on Taking Black and White PicturesWarwick Arrow Hole: Geometric Shapes in Black and White Black and white helps to learn the basics without getting too distracted; this is one reason why it is so popular among teachers. Black and white focuses the attention on form, shading, pattern, and other graphic concepts, to give them an unusual quality with tone and hue.
With a clear view toward graphics, composition, and design, the photographer can concentrate on:
  • How contrast creates lines and how lines lead the eye or psychologically affect the viewer by curving, lying flat, diagonal, or vertical.
  • How shapes or lines make a pattern and how shape with texture gives an object form.
  • How highlights compete for attention and dark tones create an important negative space.
Many artists prefer black and white because it causes the photographer and the viewer to see the world in a way that cannot be seen with the naked eye.
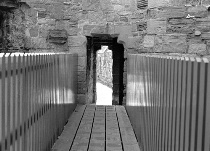
Beaumaris Bridge: Patterns in Black and WhiteSeeing the reoccurring pattern, line, or shape is easier with black and white, which does such a good job of emphasizing it. This is especially the case when a black and white photo shows good contrast - when the blacks are black, the highlights are bright, when you can still see some detail in both the highlights and the shadows.
All photographs - not just those labeled "abstracts" - are only two-dimensional representations, or abstractions, of a three-dimensional scene. Black and white makes a photograph even more of an abstraction by removing the distracting qualities of color and allowing us to concentrate on the graphic elements.
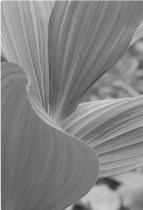
Take a look at how different an abstract photo looks in black and white. With the color removed from the overall expression, the shapes of the leaves and the lines in them take on more significance. The graphic concepts are easier to see:

Color Abstract                   Black and White Abstract

When Black and White Works Better Than ColorSome things just look better when shot in black and white. With it, you can find interest in everyday objects and scenes around you. What might appear boring when shot in color suddenly becomes fascinating when captured in black and white.
Here are a couple of situations which especially benefit from black and white:
Overcast Days
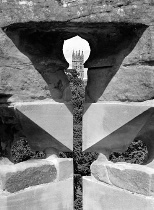
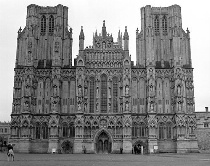
Wells Cathedral: Overcast in Black and WhiteIt can be so disappointing to get pictures back from a trip or a shoot to discover they look boring and washed out because the skies were a bright overcast gray. If you choose to shoot the same scene with black and white, you will often get great results; the focus moves to the forms and patterns and away from the dull white of the sky.
Path and Tree: Overcast in Black and WhiteBlack and white is simply fantastic for these kinds of days. The bright, overexposed sky, often blown out in both color and black and white, becomes much easier to ignore. Instead of noticing a dull sky, the viewer sees your intended subject, whether it be a person, an object, or an interesting place.
Portraits
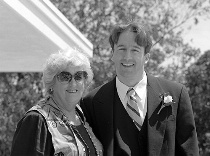
Portrait in Black and White Black and white also works very nicely for portrait photography. Skin tones, in black and white, are mellowed; blotches, blemishes, and uneven shading is less easily noticed than it is in color photos. Our eyes are very critical of facial skin tones in color but, when we examine black and white, we cannot evaluate the tones with the same critical eye.
The Fun That Can Be HadYou can set up your own darkroom to process and print your own images. Like many, you may find it magical to see an image appear out of nowhere in your film or on a print. Developing your own film can be as fun as an art project is to a preschooler. Especially if you are a do-it-yourselfer, hands-on, tactile kind of person, you will get a kick out of mixing potions, clipping film, and seeing your pictures come out of nowhere. Without color to think about, this process is much simpler in black and white than with color film. You can also color select portions of a black and white by using products such as Marshall's photo paints.


Black and white is a predominant choice among masters because it tells the graphic story clearly; it is conducive to learning the art; it connotes a classic fineness; and it is plain and simple fun.

Portrait for beginner

This article is part of the ‘Portrait Lighting For Beginners’ series. This series is meant to help you go from a beginning photographer to making beautiful portraits.
Mom and babyWhy start with just one light? Because you can get amazing portraits, that’s why. Did I mention less equipment, less complication, less cost, and less time? Oh, and once you’ve mastered portraits with a single light, using more lights is pure gravy. I have lots of lighting, but I break out a single light more often than I get out multiples. Many of you reading this have yet to really get into this lighting stuff, so you probably only have one flash. So it makes sense that the first article where we get into lighting setups would focus on portraits with just a single light.

The first thing you should do is read Metering For Flash if you haven’t already done so. This will teach you the process for getting the exposure right with the flash and camera in manual mode.

What Look Do You Want?

The first thing to do before taking a picture is decide how you want the lighting to look. In Studio Accessories you learned about some of the light modifiers available to help you change the quality of the light. So decide right now if you want the light on the subject to be hard with sharp transitions to shadows, or soft and supple.
  • For a hard look, you’ll want to simply point the flash directly at the subject.
  • For a soft look, you can use an umbrella, softbox, brolly box, scrim, or even point the flash at a nearby wall and turn the wall into a big light source.
  • Just remember, the larger the light source appears, the softer the light will be.

Light Position

HandsNext you want to figure out where to put the light. There are a few things to keep in mind here.
  • The angle will of course very much change the look of the shot and determine how much of the subject is lit versus in shadow. Experiment like crazy to see what you like best.
  • The distance between the light and the subject will affect how much light reaches the background. This is explained in The Laws of Light. Basically, if you want a darker background, you’ll want to keep the light close to the subject. If you want to lighten the background, you’ll need to move the light further from the subject.
  • Moving the light further away makes the light source appear smaller to the subject, and so the light will become harder. Moving the light source closer will do the opposite, making the light softer.
  • All these things work in concert. Making any one change affects the others, so experiment to see how moving the light around changes the look of your photos.

Filling In The Shadows and Adding Accents

As a beginner, it’s easy to think that with one light you can only make the light fall on the subject from one direction. Not so with a little creative thinking. With that one light you can fill in the shadows, add hair lights, and more. Your primary weapon to start with is the reflector. If you don’t own a store bought one, you can make one. A few household items come to mind:
Baby Closeup Foil placed camera right

Lightening The Background

Taking the last section a little further, you can easily lighten the background without blowing out the highlights on your subject. You can even make the background completely white. Mom and babyThe key is to use a scrim. A scrim is just a piece of translucent material that will diffuse the light, but at the cost of losing light.

So you place a store bought scrim (they come with those 5 in 1 reflector kits) between the light and the subject. You can also just hang a white sheet. But, make sure that the light still falls directly on the background. What happens is that the light be darker on your subject and lighter on the background. When you then adjust the exposure on your subject to compensate, the background becomes lighter! The added advantage is that the scrim is now acting as the light source on your subject. This means the light source is big, and big means soft.

Camera Settings and White Balance

Dad and son Portrait outtake,
just for fun.
Using flash can sometimes cause your camera to behave a little strange. This is especially apparent if you’re using studio lights with incandescent modeling lights. You see, the modeling bulbs in the strobes have a much warmer color temperature than the strobe bulbs do. If your camera is set on auto white balance, it will balance to the incandescent light. When you snap the picture, the photos will often times look blue because daylight balanced light from the strobes takes on a blue color when corrected in the camera for incandescent light.

How do you fix this? Just set your camera’s white balance setting to “flash” and you’re set. Or, if you’re shooting in RAW, then you can easily change the white balance after the shot if you forgot to before hand.


Your Turn

BabyNow it’s your turn to try this out for yourself. Try out this one light portrait stuff and see how you can get amazing shots with minimal equipment. Then post some of your photos to the Sublime Light photo pool so everyone can see your work. If you have questions, head on over to the Sublime Light forums, where you’ll find someone to answer your question for you.
Next week I’ll let you use two lights. Scouts honor.

Tuesday, 15 March 2011

Thursday, 3 March 2011