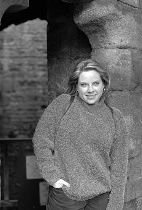
Henri Cartier-Bresson
French, b. 1908, d. 2004
Born in Chanteloup, Seine-et-Marne, Henri Cartier-Bresson developed a strong fascination with painting early on, and particularly with Surrealism. In 1932, after spending a year in the Ivory Coast, he discovered the Leica - his camera of choice thereafter - and began a life-long passion for photography. In 1933 he had his first exhibition at the Julien Levy Gallery in New York. He later made films with Jean Renoir.
Taken prisoner of war in 1940, he escaped on his third attempt in 1943 and subsequently joined an underground organization to assist prisoners and escapees. In 1945 he photographed the liberation of Paris with a group of professional journalists and then filmed the documentary Le Retour (The Return).
In 1947, with Robert Capa, George Rodger, David 'Chim' Seymour and William Vandivert, he founded Magnum Photos. After three years spent travelling in the East, in 1952 he returned to Europe, where he published his first book, Images à la Sauvette (published in English as The Decisive Moment).
He explained his approach to photography in these terms, '"For me the camera is a sketch book, an instrument of intuition and spontaneity, the master of the instant which, in visual terms, questions and decides simultaneously. It is by economy of means that one arrives at simplicity of expression."
From 1968 he began to curtail his photographic activities, preferring to concentrate on drawing and painting. In 2003, with his wife and daughter, he created the Fondation Henri Cartier-Bresson in Paris for the preservation of his work. Cartier-Bresson received an extraordinary number of prizes, awards and honorary doctorates. He died at his home in Provence on 3 August 2004, a few weeks short of his 96th birthday.
Awards
1986 Novecento Premio
1981 Grand Prix National de la Photographie
1975 Deutsche Gesellschaft für Photographie
1975 Culture Prize
1964 Overseas Press Club of America Award
1960 Overseas Press Club of America Award
1959 Prix de la Société Française de Photographie
1954 Overseas Press Club of America Award
1953 A.S.M.P. Award
1948 Overseas Press Club of America Award
Exhibitions
2006
Scrapbook - Fondation Henri Cartier-Bresson, Paris, France
2003/05
De qui s’agit-il ? - Bibliothèque Nationale de France, Paris, France;
Fundacion Caixa, Barcelona, Spain; Martin Gropius-Bau, Berlin, Germany;
Scottish National Gallery Edinburgh, UK
1998/00
Henri Cartier-Bresson Portraits: Tête à Tête - National Portrait Gallery, London,
UK; Scottish National Gallery, Edinburgh, UK;
National Portrait Gallery, Washington D.C., USA
1997/99
Des Européens - Maison européenne de la Photographie, Paris, France;
Hayward Gallery, London, UK; Le Botanique, Bruxelles, Belgium;
Museo della Fotografia Storica; Torino, Italy; Kunsthalle, Düsseldorf, Germany;
Louisiana Museum, Copenhagen, Danmark, Art Museum Helsinki City, Helsinki,
Finland
1996
Carnets mexicains de Henri Cartier-Bresson - Centre National de la Photographie,
Paris, France
1994
Hommage to Henri Cartier-Bresson - ICP, New York, USA
1991
Henri Cartier-Bresson - Osaka University of Arts, Osaka, Japan
1987
Henri Cartier-Bresson: The Early Work - The Museum of Modern Art, New York,
USA
1985/88
Henri Cartier-Bresson en Inde - CNP, Palais de Tokyo, Paris, France;
Musée de l'Elysée, Lausanne, Switzerland; ICP, New York, USA;
National Gallery of Modern Art, New Delhi, India
1984/85
Photographs by Henri Cartier-Bresson from Mexico, 1934 and 1963 - Art Museum of South Texas, Corpus Christi, USA;
Center for Creative Photography, Tucson, USA
1984
Paris à vue d'oeil - Musée Carnavalet, Paris, France
1980
Henri Cartier-Bresson : 300 photographies de 1927 à 1980 -
Musée d'Art moderne de la Ville de Paris, Paris, France
1979/80
Henri Cartier-Bresson Photographer, ICP, New York, USA; The Art Institute,
Chicago, USA; Carnegie Institute, Pittsburgh, USA; Virginia Museum of Fine Arts,
Richmond, USA, Palacio de Bellas Artes, Mexico City, Mexico;
Seattle Art Museum, Seattle, USA
1978
Cartier-Bresson : Archival Collection - Osaka University of Arts, Osaka
1976
Selected Photographs by Henri Cartier-Bresson - The National Gallery
of Modern Art, New Delhi, India
1974
A propos de l'URSS 1953-1974 - ICP, New York, USA
1970
Henri Cartier-Bresson : En France - Galeries nationales du Grand Palais, Paris
1969
Photographs by Henri Cartier-Bresson - Victoria & Albert Museum, London, UK;
Graves Art Gallery, Sheffield, UK; City Art Gallery, York, UK;
City Art Gallery, Leeds, UK; Museum of Modern Art, Oxford, UK
1968
Cartier-Bresson : recent photographs - The Museum of Modern Art,
New York, USA
1966
Photographies d'Henri Cartier-Bresson - Musée des Arts Décoratifs,
Paris, France; Villa Comunale, Milano, Italy; Kunsthalle Köln, Germany
1966
After The Decisive Moment 1966-1967 - Asahi Shimbun, Tokyo, Japan
1964
Photographs by Cartier-Bresson - The Phillips Collection, Washington D.C., USA
1957/60
Henri Cartier-Bresson : The Decisive Moment (same exhibition than in 1955/56) -
R.B.A Gallery, London, UK; Nihombashi Takashimaya, Tokyo, Japan;
M.H. de Young Memorial Museum, San Francisco, USA, IBM Gallery,
New York, USA,
1955/56
Henri Cartier-Bresson : Photographies 1930-1955 - Musée des Arts Décoratifs,
Pavillon de Marsan, Paris, France; Kunstgewerbemuseum, Zürich, Switzerland;
Stadtisches Museum, Leverkusen, Germany; Kunstverein München, Munich,
Germany; Bremer Kunsthalle, Bremen, Germany; Staatliche Landesbildstelle
Museum, Hamburg, Germany; Palazzo della Societa per le belli Arti, Milano,
Italy; Circolo della Provincia, Bologna, Italy
1953
Great Documentary Photographer :
Henri Cartier-Bresson - The Art Institute
of Chicago, Chicago, USA
1952
215 fotografie de Henri Cartier-Bresson - Strozzina di Firenze, Firenze, Italy
1952
Photographs by Henri Cartier-Bresson - Institute of Contemporary Arts, London,
UK
1947
The Photographs of Henri Cartier-Bresson - The Museum of Modern Art, New York,
USA
1935
Fotografias : Cartier-Bresson, Alvarez Bravo - Palacio de Bellas Artes de Mexico,
Mexico City, Mexico
1935
Documentary & Anti-Graphic Photography - Photographs by Cartier-Bresson
Walker Evans & Manuel Alvarez Bravo - Julien Levy Gallery, New York, USA;
1933
Photographs by Henri Cartier-Bresson and an exhibition of
Anti-Graphic Photography - Julien Levy Gallery, New York, USA;
Ateneo Club, Madrid, Spain
Collections
Bibliothèque Nationale de France, Paris, France
De Menil Collection, Houston, USA
University of Fine Arts, Osaka, Japan
Victoria & Albert Museum, London, UK
Maison Européenne de la Photographie, Paris, France
Musée Carnavalet, Paris, France
The Museum of Modern Art, New York, USA
The Art Institute of Chicago, USA
The Getty Museum, Los Angeles, USA
International Center of Photography, New York, USA
The Philadelphia Art Institute, Philadelphia, USA
The Museum of Fine Arts, Houston, USA
Kahitsukan Kyoto Museum of Contemporary Art, Kyoto, Japan
Museum of Modern Art, Tel Aviv, Israel
Stockholm Modern Museum, Stockholm, Sweden
Books
2006
Scrapbook, Steidl, Germany
2006
Portraits par Henri Cartier-Bresson, Thames & Hudson, France;
(The portraits of Henri Cartier-Bresson) Thames & Hudson, UK
2003
De qui s'agit-il ?, Gallimard/Bibliothèque Nationale de France;
(
The Man, the Image and the World) Thames & Hudson, UK;
(Di chi si tratta ?) Contrasto, Italy
2001
Paysages, Delpire éditeur;
(Landscape Townscape) Thames & Hudson, UK;
(City and Landscapes) Bulfinch, USA;
(Paesaggi) Contrasto, Italy;
(Landschaften und Städte) Schirmer & Mosel, Germany
1998
Tête à Tête, Gallimard, France; Thames & Hudson, UK;
Bulfinch, USA; Schirmer & Mosel, Germany;
Leonardo Arte, Italy
1997/98
Des Européens, Le Seuil, France; (
Europeans) Thames & Hudson, UK;
Bulfinch, USA; (
Europaër) Schirmer & Mosel, Germany;
(Gli Europei) Peliti Associati, Italy
1996/99
L'Imaginaire d'Après Nature, Fata Morgana, France;
(The Mind's eye)
Aperture, USA
1995
Carnets mexicains 1934-1964, Hazan, France
;
(Mexican Notebooks 1934-1964) Thames & Hudson, UK;
(Henri Cartier-Bresson Messico 1934-1964) Federico Motta Editore, Italy
1995
L'Art Sans Art, Flammarion, France;
(Henri Cartier-Bresson and the Artless Art)
Thames & Hudson, UK;
Bulfinch, USA;
(Henri Cartier-Bresson Seine Kunst Sein Leben)
Schirmer & Mosel, Germany
1994
Double Regard. Drawings and Photographs, Le Nyctalope, France
1994
Paris à vue d'oeil, Le Seuil, France
; (A Propos de Paris) Thames & Hudson,
UK; Bulfinch, USA; Schirmer & Mosel, Germany
1991
Alberto Giacometti photographié par Henri Cartier-Bresson, Franco Sciardelli,
Italy
1991
L'Amérique Furtivement, Le Seuil, France
; (America in Passing) Bulfinch, USA;
Thames & Hudson, UK, Schirmer & Mosel, Germany;
Federico Motta Editore, Italy
1991
Henri Cartier-Bresson - Premières photos : de l'objectif hasardeux au hasard
objectif, Arthaud, France
1989
L'Autre Chine, Centre National de la Photographie, France
1989
Trait pour trait, Arthaud, France; (
Line by Line: Henri Cartier-Bresson’s Drawings)
Thames & Hudson, UK, Schirmer & Mosel, Germany
1987
Henri Cartier-Bresson in India, Thames & Hudson, UK, USA
1987
Henri Cartier-Bresson - The Early Work, The Museum of Modern Art, New York, USA
1985
Photoportraits, Gallimard, France; Thames & Hudson, UK, USA;
Schirmer & Mosel, Germany
1985
Henri Cartier-Bresson en Inde, Centre National de la Photographie, France
1983
Henri Cartier-Bresson: Ritratti 1928-1982 (Collection "I Grandi Fotografi"),
Gruppo Editoriale Fabbri, Italy
1982
Photo Poche, Centre National de la Photographie, France
1979
Henri Cartier-Bresson: Photographe, Delpire éditeur, France;
(
Henri Cartier-Bresson: Photographer) Bulfinch, USA ;
Thames & Hudson, UK;
Pacific Press Service, Japan
1973
A propos de l'URSS, éditions du Chêne, France; (
About Russia)
Thames & Hudson, UK; Viking Press, USA
1972
The Face of Asia, John Weatherhill, USA & Japan; Orientations Ltd.,
Hong Kong;
(Visage d'Asie) éditions du Chêne, France
1970
Vive la France, Robert Laffont, France; (
Cartier-Bresson's France)
Thames & Hudson, UK; Viking Press, USA
1969
L'homme et la machine, commissioned by IBM, éditions du Chêne, France;
(
Man and Machine) Viking Press, USA; Thames & Hudson, UK
1969
Les Français, éditions Rencontre, Switzerland
1968
Flagrants délits - Photographies de Henri Cartier-Bresson, Delpire éditeur,
France;
(The World of Henri Cartier-Bresson) Viking Press, USA
1963
China as photographed by Henri Cartier-Bresson , Bantam Books, USA
1963
Photographies de Henri Cartier-Bresson, Delpire éditeur, France;
(Photographs by Henri Cartier-Bresson) Grossman Publishers, USA;
Jonathan Cape, GB; Asahi Shimbun, Japan
1958
Henri Cartier-Bresson: Fotografie, Statni Nakladatelstvi
Krasné,Czechoslovakia
1955
Les Européens, Verve, France;
(The Europeans) Simon & Schuster, USA
1955
Moscou vu par Henri Cartier-Bresson, Delpire Editeur, France;
(People of Moscow)
Thames & Hudson, UK; Simon & Schuster, USA
1954/56
D'une Chine à l'autre, Delpire éditeur, France; (
China in Transition)
Thames & Hudson, UK; (
From One China to Another) Universe, USA
1954
Les Danses à Bali, Delpire éditeur, France
1952
Images à la Sauvette, Verve, France;
(The Decisive Moment) Simon & Schuster,
USA
1947
The Photographs of Henri Cartier-Bresson, The Museum of Modern Art, USA
Films
1969/70
Impressions of California, 23', color
1969/70
Southern Exposures, 22', color
1944/45
Le Retour (
The Return), 32', b&w
1939
La Règle du Jeu (
The Rules of the Game), assistant to Jean Renoir
1938
L’Espagne vivra, 43', b&w
1937
Victoire de la Vie (with Herbert Kline), 49', b&w
1936
Une Partie de Campagne, second Assistant to Jean Renoir
 Painting with light is a fun technique that gives great results. It is called painting with light because this is what you are actually doing while taking the shot - painting with light.